Waste even more time online. No ads. No tracking.
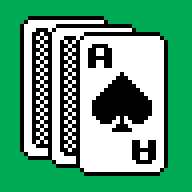
FreeCell
FreeCell is a patience-type game where all 52 cards are dealt face up on eight "cascades." The goal is to play cards by suit, from low to high rank, on four "foundation" spaces (similar to Klondike solitaire). The twist is that only one card can be moved at a time. To help move cards around the tableau, there are four "free cells," which can hold any card. As an affordance, most electronic versions of the game allow moving stacks of cards, as long as the stack is smaller than empty cells + 1 (this is simply to make the game slightly less tedious). Caution is required when moving cards to the cells, as they can only be moved back to cascades in sequential order, with alternating colors. Experiment as much as you want, however, as there's always the "undo" feature to back yourself out of a jam.
Klondike
Play the solitaire variation Klondike, popularized by its inclusion in Windows 3.0. This game is what most people think of when they hear the term "solitaire." Build up cascades of sequential cards in alternating colors, then play them from low to high on four foundations. Rest assured that the most important component of the game, the "card waterfall" effect when you win, has been included.
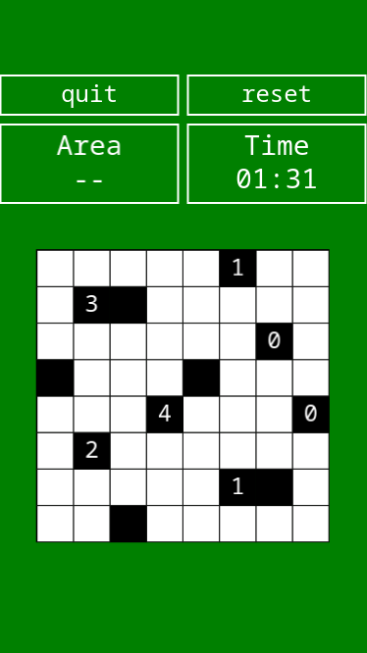
Minesweeper
Even though Minesweeper was one of the games that was pre-installed on many older Windows versions, I never learned how to play it until I programmed a copy. Left-clicking a cell in the grid will reveal its contents: either a bomb (you lose!) or a numeric clue. The clue indicates how many bombs are in the eight adjacent cells. Right-click to place a flag indicating the presence of a bomb — in many cases you can logically deduce (or guess) which cells contain a bomb. If playing on mobile, you can zoom/pan around the game grid, as well as tap & hold to reveal all the un-flagged cells that are adjacent to a previously-revealed cell.
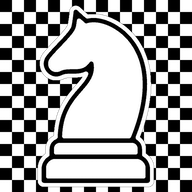
Knight's Tour
I learned about this game from reading Steve Wozniak's autobiography. The goal is to visit each square on a chess board, using a knight piece. However, once you visit a square, you can't land on it again. Since the knight moves in an irregular fashion, it's easy to get trapped if you aren't paying attention. When Woz was a kid, he tried to write a program that would brute force a solution. At first, he thought the program got stuck in an infinite loop, but after some debugging realized that it was working as intended — it would just take 1025 years to finish.
Nonogram Madness
The goal of a nonogram puzzle is to "fill" all the correct blocks in a grid. The key to solving each puzzle is the numbers on the top and left of the grid. Each number gives you a clue about how many blocks are filled in each row or column. For example, if the clue for a row was "4 3 1", that means there are four sequentially filled blocks, a gap of one (or more), three filled blocks, another gap, and then finally one filled block on its own. In a 10x10 puzzle grid, this clue solves the whole row: 4 filled + 1 blank + 3 filled + 1 blank + 1 filled = 10 total. Solve easy clues first, then you can logically fill in the rest of the blocks in the grid.
Let's Build Bridges
Let's Build Bridges is a collection of logic puzzles, also known as Hashi, Bridges, or Chopsticks. The goal of each puzzle is to connect all the "islands" by drawing a series of "bridges" between them. The rules are:
- Bridges must start and end at an island.
- Bridges can only be drawn vertically or horizontally.
- Bridges cannot cross each other.
- At most, two bridges can be drawn between islands.
- The number of bridges connected to each island must match the number on the island.
- The bridges must connect all the islands together.
The first few puzzles are easy, but watch out, as the difficulty ramps up quickly! There are 100 puzzles to solve. Have fun building bridges!
Shikaku Madness
Are you a puzzle maniac? Do you eat Japanese logic games like sudoku and nonograms for breakfast? Give Shikaku Madness a try. It's a fun and challenging game, with lots of unique puzzles to solve. Bust your brain as you try to figure out how to completely cover the game grid using squares and rectangles. Sound complicated? Don't worry! The first few levels provide an interactive tutorial to help new players learn the rules.
Click & drag on the puzzle grid to draw. Each number on the grid is a clue; the number represents the size of the rectangle that overlaps it. For example, a clue of "9" means that you need to draw a 3x3 square on top of that clue. The trick is to draw each square and rectangle so that there's no wasted space on the grid. You can't overlap squares, either. Fortunately, there's no time limit, and you can always try again if you make a mistake.
Akari Madness
Yet another logic puzzle! Also known as "Light Up", the goal is to illuminate the entire game board by strategicly placing lights such that no two shine on each other. Another limitation is that there are black cells which block light. These cells may also display a number, which indicates the number of lights that must be placed in one of the four adjacent cells (lights placed diagonally do not count). Otherwise, there are no restrictions about where to place lights, as long as they don't shine on each other.
Play Akari Madness →